Debugging with a VMU
The Visual Memory Unit (VMU), which is also known as VM or VMS (Visual Memory and Visual Memory System, respectively), is a very neat and unique feature of the Dreamcast. A while later, Nintendo would do a great job of continuing on with the second screen gameplay via the GameCube to Game Boy Advance link cable, but I digress.
I’m not planning on using the VMU stand-alone as I don’t have any idea on what could be done as a mini-game with Shambler. Currently, I don’t yet know what to display on there in-game, either. For the time being, it’s used to display debug information on a retail unit. It’s not impossible to draw text on the screen, however, it’s also not something that I want to clutter up with debug information if possible. That’s what debuggers and development kits are for. There are the odd occasions where it’s necessary to try to catch a bug that’s only appearing on a retail unit that doesn’t warrant more than a handful of characters.
As an example, the following message from Headhunter is something that both requires more characters than a VMU can reasonably display and is also a fatal error that cannot be recovered from and is important to show to the user (image source):
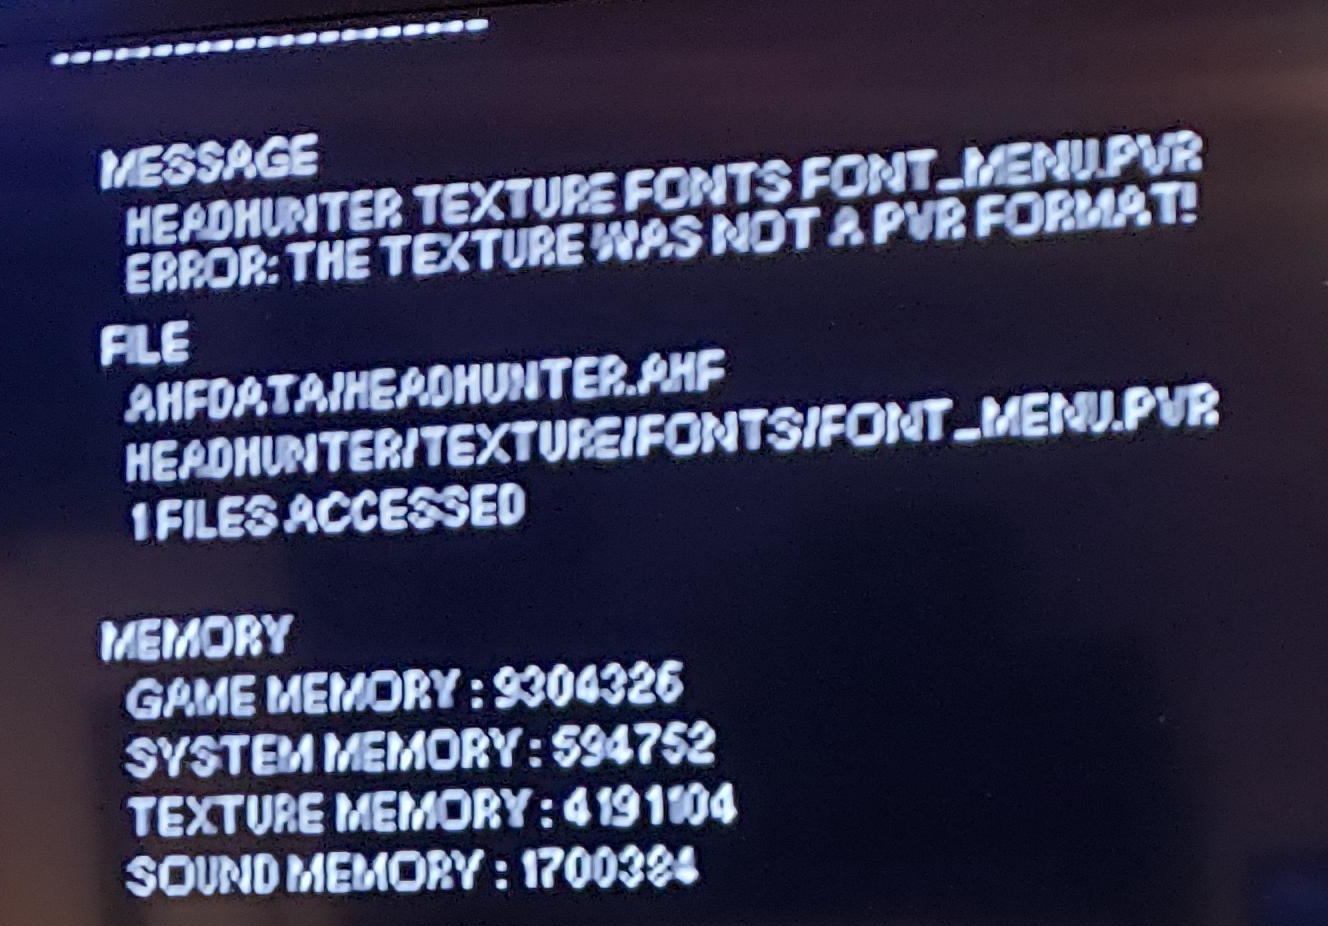
The information displayed above is rather technical and not user-friendly. Then again; if you’ve ever tried to update a modern console and an error occurs, you’ll also be greeted with an error code or two to decipher what exactly went wrong. I’d imagine that in the future QR codes may be used to display more information, like Linux and Windows, with a fallback to the code(s). Back to the Dreamcast…
So far, there have been two instances where these debugging messages have been invaluable. First was when attempting to connect with a retail kit. I’ve used this Dreamcast before when connecting to PSO and using the Broadband Adapter. It should be fine. For some strange reason, the network settings stored in Flash memory were not being acquired (still aren’t, I’ll get to that) and I printed out three important values: the dial string, username, and password. All of these were empty. After many hours spent burning CD-Rs (I’ll get to that, too) I finally got to the stage where I could stop worrying if there was something wrong with my whole setup. Before this I knew that DreamKey 3.0 worked, so there couldn’t be an issue connecting with the settings on the unit, and one of the samples was even connecting after modifying the username/password being used. In the end, for the first issue, I decided to check if any of those three settings were empty and set them to known “good” values. Another unit is having an issue with another stored setting, but I’ll fix the issue properly instead of relying on somehting that works internally for the moment.
Instance two was more troublesome. I had an issue with the GD-ROM unit, but not really. As I was writing about 1MiB of a 700MiB CD-R, it seemed awfully wasteful (of both time and resources) to write a new one each time a change is made to test with. When trying to use DreamShell with its SD card ISO loader to run the game it just seemed to hang (when attempting to use the built-in reboot call from the SDK it hangs, though there may be a better way of doing this for DreamShel). The process is to compile the release version, copy it over the network to another machine that’s a little more modern and copy the image to the SD card for DreamShell to use. Though I didn’t know that the problem was with the GD-ROM, virtually in this case, for certain, it was a hunch. Writing out to the LCD seems to require (at least for the Katana SDK) the video subsystem to be set up so that during a V-blank the LCD can be updated. When I was testing this on the development kit, it wasn’t until after the renderer was initialised that anything appeared, so I’m assuming it’s the case and will investigate further when I have free time to do that. At this point; the GD-ROM is initialised before the renderer, which meant that nothing was appearing on the VMU. After putting the renderer initialisation as close to the start as possible, I could see that there would only be one attempt to initialise the GD-ROM, then it would return an error code. This is because I very stupidly wrote the following (the relevant section is in the for loop):
Sint32 FS_Initialise(
	const PFILESYSTEM_INITIALISE_PARAMETERS p_pInitialiseParameters,
	PMEMORY_BLOCK p_pMemoryBlock )
{
	Uint32 RootDirectoryBuffer[ GDFS_DIRREC_SIZE( 64 ) ];
	Sint32 Error;
	Uint32 Retry;
	bool DriveInitialised = false;

	g_pWorkArea = MEM_AllocateFromMemoryBlock( p_pMemoryBlock,
		GDFS_WORK_SIZE( p_pInitialiseParameters->MaxOpenFiles ) + 32,
		"GD drive file work area" );
	g_pDirectory = MEM_AllocateFromMemoryBlock( p_pMemoryBlock,
		GDFS_WORK_SIZE( p_pInitialiseParameters->MaxFileHandleCount ) + 32,
		"GD drive file handles" );

	for( Retry = p_pInitialiseParameters->RetryCount;
		Retry > 0 && ( DriveInitialised == false ); --Retry )
	{
		Error = gdFsInit( p_pInitialiseParameters->MaxOpenFiles, g_pWorkArea,
			p_pInitialiseParameters->MaxFileHandleCount, g_pDirectory );

		switch( Error )
		{
			case GDD_ERR_OK:
			{
				DriveInitialised = true;
				break;
			}
			case GDD_ERR_TRAYOPEND:
			{
				LOG_Error( "[FS_Initialise] Disc tray open" );
				return FS_INITIALISE_ERROR_TRAYOPEN;
			}
			case GDD_ERR_UNITATTENT:
			{
				LOG_Error( "[FS_Initialise] GD drive hardware failure" );
				return FS_INITIALISE_ERROR_HARDWARE_FAILURE;
			}
			default:
			{
				LOG_Error( "[FS_Initialise] Unknown error" );
				return FS_INITIALISE_ERROR_UNKNOWN;
			}
		}
	}

	if( Retry == 0 )
	{
		LOG_Error( "[FS_Initialise] Failed to initialise the GD drive after "
			"%lu retries.", p_pInitialiseParameters->RetryCount );

		return FS_INITIALISE_ERROR_RETRIES_EXHAUSTED;
	}

	g_RootDirectory = gdFsCreateDirhn( RootDirectoryBuffer, 64 );
	do
	{
		Error = gdFsLoadDir( ".", g_RootDirectory );
	}while( Error == GDD_ERR_BUSY );

	switch( Error )
	{
		case GDD_ERR_OK:
		{
			break;
		}
		case GDD_ERR_DIROVER:
		{
			LOG_Error( "[FS_Initialise] Exceeded storable entries" );
			return FS_INITIALISE_ERROR_STORABLE_ENTRIES_EXCEEDED;
		}
		default:
		{
			LOG_Error( "[FS_Initialise] Unknown error occurred loading the "
				"root directory" );

			return FS_INITIALISE_ERROR_UNKNOWN;
		}
	}

#if defined( SHAMBLER_BUILD_DEBUG )
	LOG_Info( "[FS_Initialise] GD drive initialised" );
	LOG_Info( "\tMaximum open files: %lu",
		p_pInitialiseParameters->MaxOpenFiles );
	LOG_Info( "\tMaximum file handle count: %lu",
		p_pInitialiseParameters->MaxFileHandleCount );
#endif /* SHAMBLER_BUILD_DEBUG */

	return FS_OK;
}
Realising my mistake, I removed the return in the default case and then the game worked without any more issues (so far). Annoyingly, in the interest of finding out why at least one iteration failed, I tried to catch the error code and on which iteration it occurred. Strangely, I couldn’t find out why it would fail. Another mystery for the pile.
One great thing about all of this is that I now have a neat VMU display font. Much thanks goes to Vassilii Khachaturov for his Palm Pilot VT100 font:

Here’s what it looks like on a VMU (I apologise for the dust and any coffee spatter on the controller and/or VMU display):
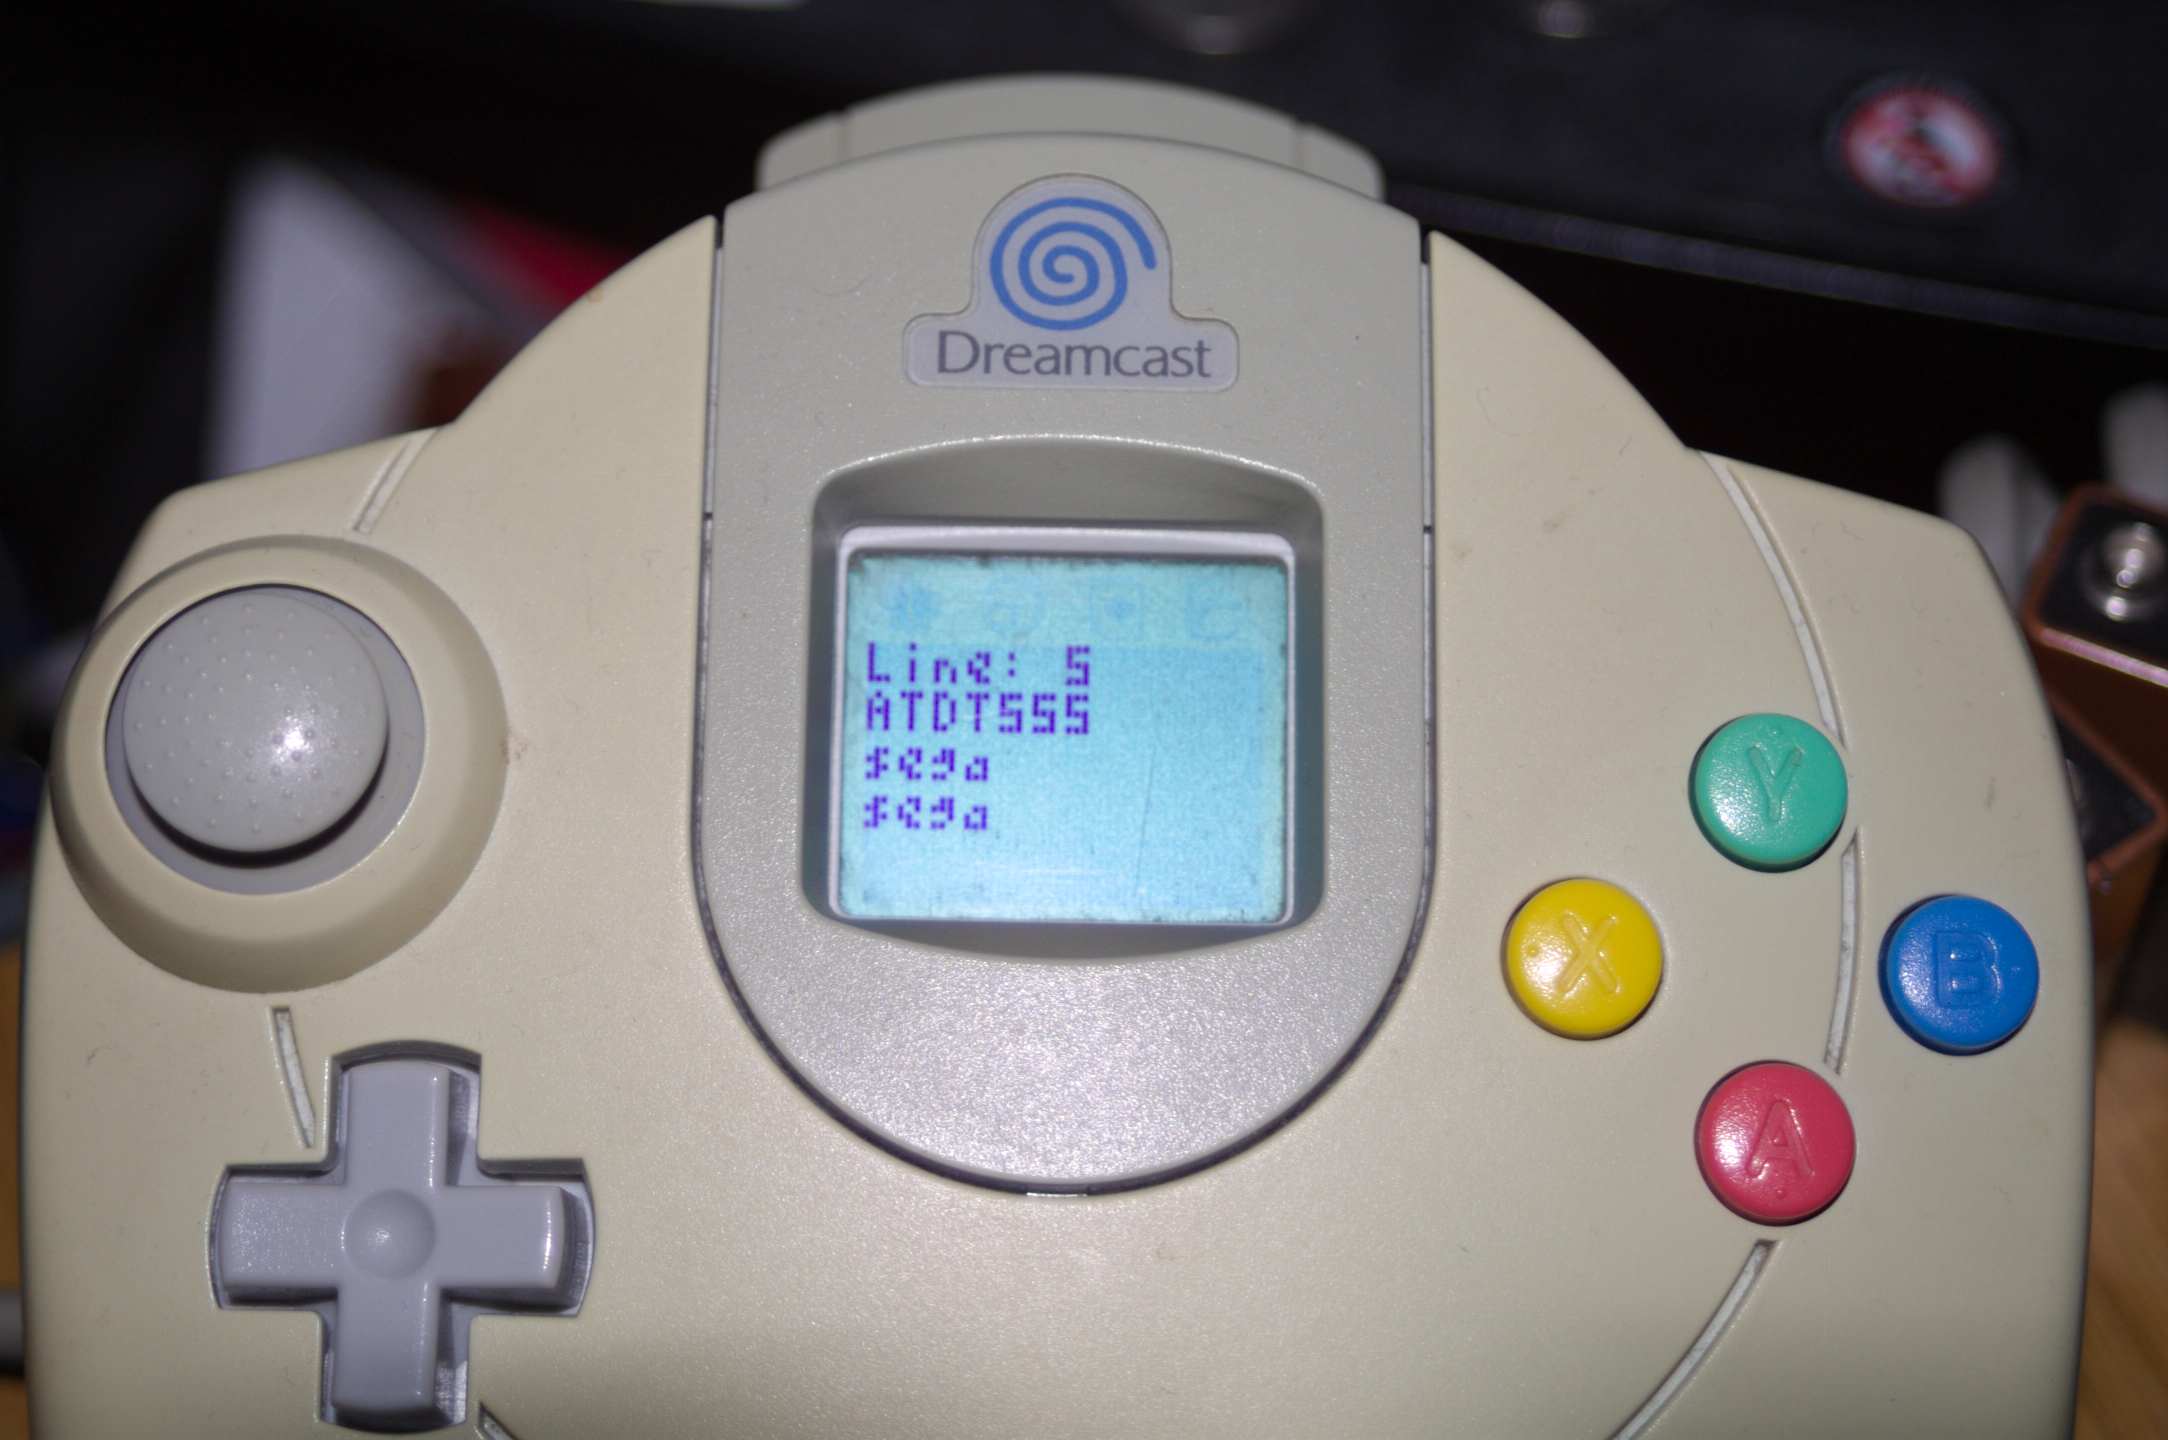
The above shows the line being executed in the modem script (there are currently 12 in total with number 5 containing the AT command for the phone number to dial) with the dial string displayed below it. Underneath the first two lines are the username and password, respectively. This was taken from the development kit which has everything set up correctly.
I have an issue with the Broadband adapter, but I think I’m going to leave that for another time. Right now I want to get both the retail and development kits sending information to each other and getting a game of “tag” running before getting back to the game proper. I’ll be releasing that version if anyone wants to test it as soon as it’s done.