Rendering things that can't be rendered on a Dreamcast
One thing I’ve been wanting to do for a very long time is add point and line rendering for debugging. This is very easy today. You just set up your graphics pipeline to render with points, lines, or solids. Unfortunately, the PowerVR chip on the Dreamcast only supports solid rendering of triangle strips. This makes a lot of things pretty hard. Not only can you not render triangle lists, you also can’t just render a point or a line!
To get around this; I’ve created an 8-bpp texture that is going to be drawn after everything else on the screen. There is a huge performance and memory penalty for this, but as it’s only for debugging, it’s really not too bad. At the moment, I’m only using a single 512x512 texture which will either be supplemented by an additional three or four 128x128 textures to get support for the full 640x480 framebuffer. Alternatively, I could render to 512x384 to preserve the aspect ratio or 320x240 to keep the pixels better aligned to the display. These are both still options, as the current performance is concerning, though I haven’t begun to see where the bottleneck is.
Another texture format that may be of use is 4-bpp to save on bandwidth and memory, which would work as I don’t think I’ll be using more than 16 colours.
Great. So that’s pretty easy, just write out points to the texture surface and be done with it, right? Not so fast! Another issue is that the palette-based texture formats cannot be in an untwiddled format. A twiddled format means that the data is accessed in a reverse-N fashion. Starting with the top-left, going to the bottom-left, then top-right, followed by bottom-right. This is done on a 2x2, 4x4, 8x8, etc. basis all the way up to the size of the texture (which has to be a power-of-two). The following image from the PowerVR Texture Tool reference manual does a better job of showing how it works:
This means that in order to draw a point, you can’t simply render to the row*width+column and be done with it. You need to find out which pixel in which block to use. For simplicity; I opted to take advantage of 32x32 tiles and index into these, further indexing into a 32x32 tile and adding both the tile’s first pixel offset plus the one in the tile. It took a few hours and a fair amount of frustration. About two hours in, I thought to look up if this had been done before, luckily Dan Potter (thanks, Dan!) created a twiddler/detwiddler tool (http://cadcdev.sourceforge.net/softprj/twiddle.c) that took care of the indexing work. I’ve created two tables: one for the 32x32 tile and another for the texture (512x512 and 128x128 in the future) to avoid needing to calculate the texel every time and call an expensive recursive function.
Now that the texels can be changed as I choose, let’s see how I did:
This definitely wasn’t a success. This came as a result of bad strip context settings that really messed up. I can’t remember the exact configuration used and I ended up going with the text rendering code’s strip context to get alpha working properly. I’m pretty sure it was a case of both blending and alpha enabling flags that had to be modified.

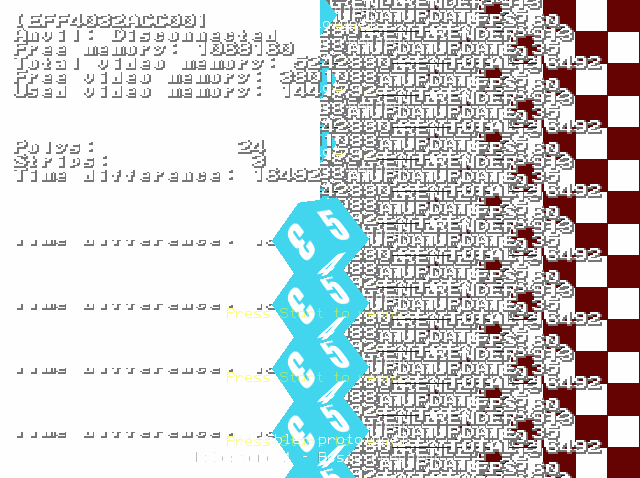
A little closer. It was just a result of not initialising the texture correctly, but I thought it was a fun bug to show as I was transplanting code from the test game state into the renderer. If you wanted to see what’s at address 0x00000000 of a Dreamcast, there you go. You can see the limits of the 512x512 texture on the right-hand side which I intend to fix by either using four 128x128 textures or using the remaining 512x32 strip at the bottom of the 512x512 and three additional 128x128 textures. The legwork involved shouldn’t be too taxing, though I think that it may be too much strain on the Dreamcast. It’s also worth noting in that screenshot the framerate. It goes down to 15FPS, taking 62ms as can be seen in the top-right. The screenshot was taken before the next FPS counter update.
Vastly better. This was about an hour after the previous attempt. You can see the green pixel in the top-left which was there due to an address issue with the tables not being set up correctly that was being debugged. Obviously, the texture needed to be cleared on the start of each frame.
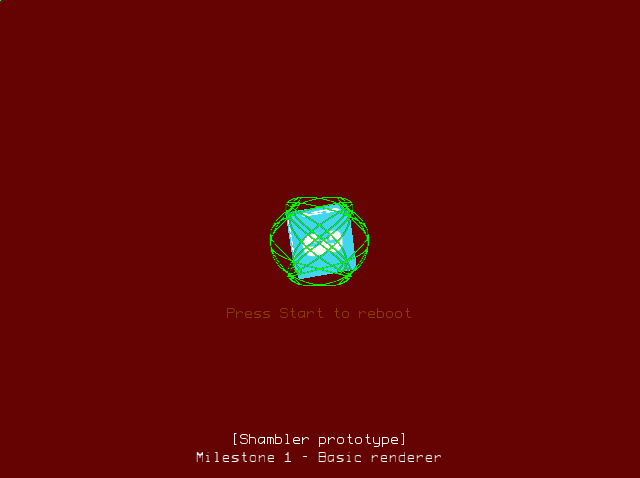
There are two texels there near the centre of the image that are the points both in front of and behind the cube. Look very, very closely at the vertices of the cube and you may see the magenta highlight.
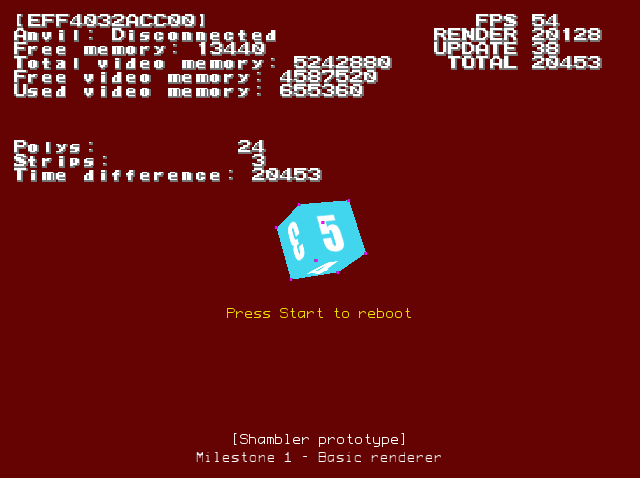
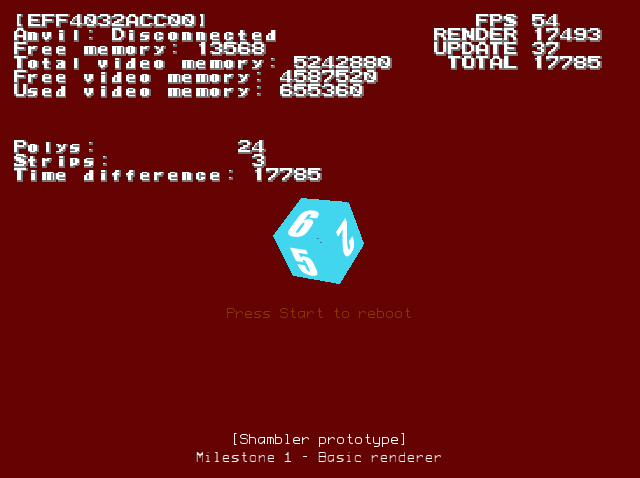
Finally, this shows the points rendered correctly 3x3 points. It’s rendered with the centre point the same as before, plus eight points surrounding it. The render time is better, but not confidence-inspiring. Especially if I’m planning on adding another three or four textures in the mix. As long as it’s above 32ms, it should be okay, but no heavy rendering has even been started, yet.
The main reason for taking a detour like this it to visualise the joints and normals as well as render things in wireframe. I’ll add in support for line rendering, which should be the last thing for this debug view, functionally. I’m unsure if I’ll spend much, if any, time looking into performance with this.